Sharing another fun project from my new crafty book: Washi Tape Christmas. Can you believe that we have now entered the big Christmas countdown?! December seems to just fly by, don’t you think? So far from the book, I’ve shared the Sneek-A-Peek Packs and the Washi Tape Christmas Wreath. Today I’m going to show you how easy it is to make a simple bow out of washi tape. I still have a few Washi Tape Christmas Book gift pack sets left…they would make an adorable gift for a crafty daughter, friend, wife or mom. With 30 different ideas in the book, you can easily make a bunch of them work throughout the year…just change up the patterns of washi tape for the project you chose to make.
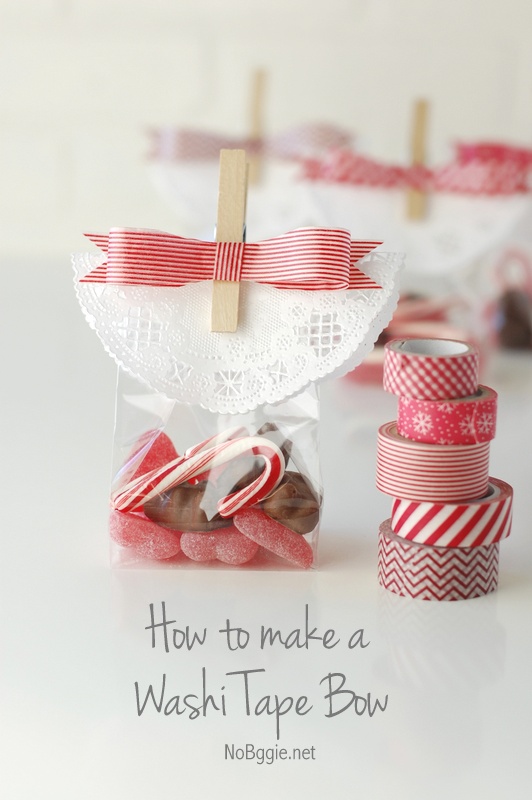
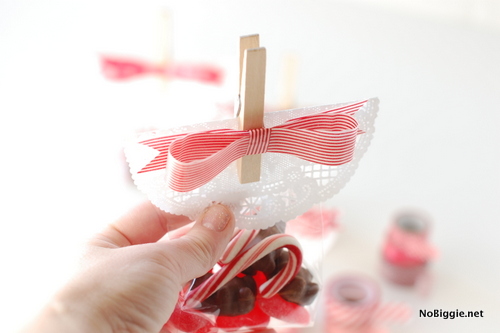
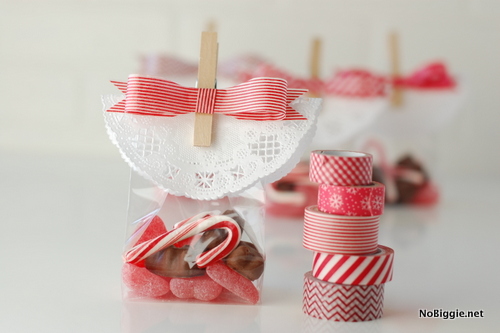
Here’s a fun way to close off a food gift…if you plan on making a sweet treat for a friend, neighbor or coworker. By using a natural wooden close pin, this washi tape bow can be re-used again and again. You could even adhere a magnet along the back of the clothes pin and then they can use this decorative clothes pin to hold up photos on the fridge during the holidays.
Here’s what you’ll need to make a simple washi tape bow:
– Washi Tape (in assorted colors)
– fine tip scissors
– heavy duty glue dots
– a ruler
– natural wood clothes pins
– clear cellophane bags
– candy or a homemade treat
Directions:
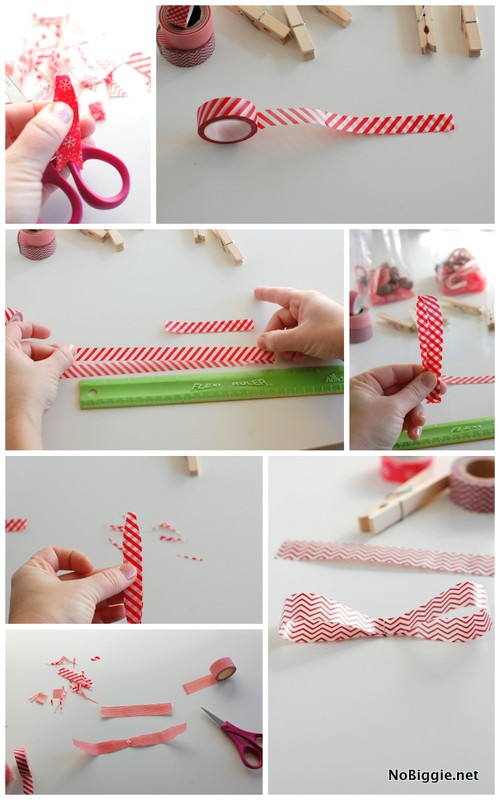
Using your ruler cut three different lengths of washi tape to make one bow: Large 16 inches – Medium 8 inches – Small 1 inch. The longest length will make the main piece of the bow looping in on itself, the medium piece will be the back of the bow with the ends notched out and the smallest length will be the center piece holding the two bigger pieces together.
Fold the longest length of washi tape in half and tape sticky side to sticky side to itself creating now one 8 inch length piece with no sticky sides exposed.
Repeat the step above with the medium length piece so now that length is 4 inches with no sticky sides exposed.
Take the long piece and fold it in half again, and with your scissors, notch out the edge of each side to make the center more narrow. Using your scissors again on the medium length piece to do the same with the medium piece. You will also cut out a “v – shape” out of each end. These will be the decorative ends of the bow.
Open the longest piece up and add a glue dot to the center and create the loops of the bow by sticking the ends to the center. Now you have the loops of the bow.
Stick the medium length piece behind the looped piece adhere together with another glue dot. Wrap the third “small” piece of washi tape around the two bigger pieces to finish off the bow. Use a third glue dot to stick them together and a fourth glue dot to adhere the bow onto the clothes pin. You could alternately use a low temp hot glue gun in the place of glue dots if that’s your preferred way to create these simple bows.
That’s it! Now you have a simple cute way to wrap up treats this holiday season.
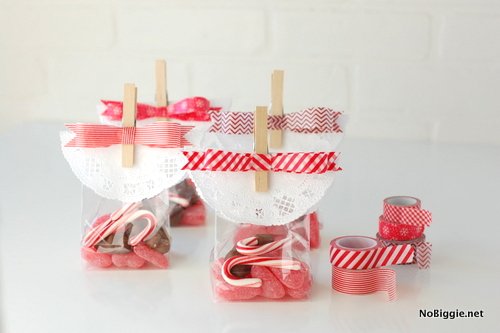
These bows are fun to make year round. They would be darling on a bunch of party favors.
Have you ever made a washi tape bow? Are you in love with all the fun things you can do with washi tape as I am?!
