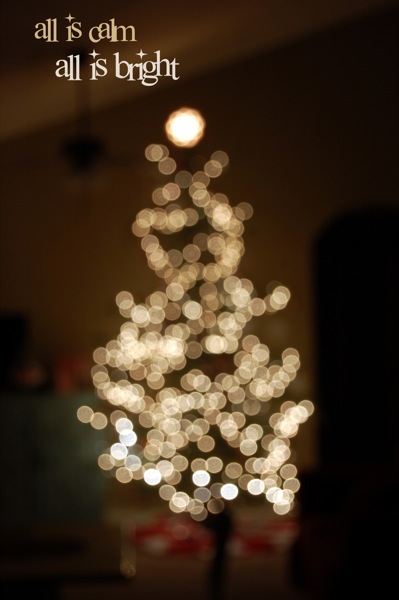
How to take a blurry picture of your Christmas Tree with the camera on your phone:
1. Wait until evening when there is no competing light from a window outside.
2. Hold your hand out in front of your phone and make your camera of your phone focus on your hand with the back ground of the Christmas Tree lights out of focus.
3. Press and hold the focus of your phone camera until you get the little yellow icon that reads: AE/AF Lock, which stands for Auto Exposure and Auto Focus. Now your focus and exposure are locked.
4. With the focus locked, you can now take your hand out of the photo and your tree will look blurry. Now you can take the magical blurry photo.
How to take a blurry photo of your Christmas Tree with a DSLR Camera:
1. Wait until evening, especially if your tree is near a window. You don’t want extra light in the picture.
2. Use a lens with a low aperture setting (I used a 50mm 1.8 lens), put the camera on AV setting, and set the aperture as low as it can go. If you don’t have a low aperture lens, it’s a little harder to get this effect, but it can be done. Stand as far away from the tree as you can and zoom in until the tree (or just the top portion of the tree) fills up the entire picture. The farther your lens is zoomed, the more out of focus you’ll be able to get the picture (out of focus = bigger circles of light).
3. Compose your shot and press your shutter button halfway down to focus. Then find the little button on your lens that says AF and MF, and change it to MF, which is manual focus.
4. Find your manual focus ring and start turning it one way or the other to get the picture out of focus. As the picture gets farther and farther out of focus, the tree lights will turn into larger and larger circles. Snap a number of pictures, turning the focus ring a little more for each one. Your shutter speed is going to be quite slow, so be sure to brace yourself as you snap away. (Don’t worry about a tripod – a little camera shake isn’t going to matter much since the picture is out of focus anyway.)


